CYOA Studio Manual
Project structure
A CYOA is called a project. Each project consists of sections, each of which can have a title, a description and any number of options. The options each also have a title and a description, and can also contain an image.
In order to be displayed, and finally exported to an image, the project also uses a template. The default template is quite bland, but you can import another theme at any time to change the appearance of your CYOA without affecting the content you have already entered.
Editing a project
Upon starting the program, you will be greeted by the main editing tab.
Using the Project menu at the top, you can start a new project, open one or save your currently opened project.
You’ll also find several options for project import/export and changing the template.
On the left, you can switch between three categories:
- The
Contenttab allows you to edit your sections and options. - The
Project settingstab allows you to edit general options for your project (including the title) - The
Styletab allows you to customize the template your project is using. - The
Previewtab allows you to view your project in the form it would look like if exported right now.
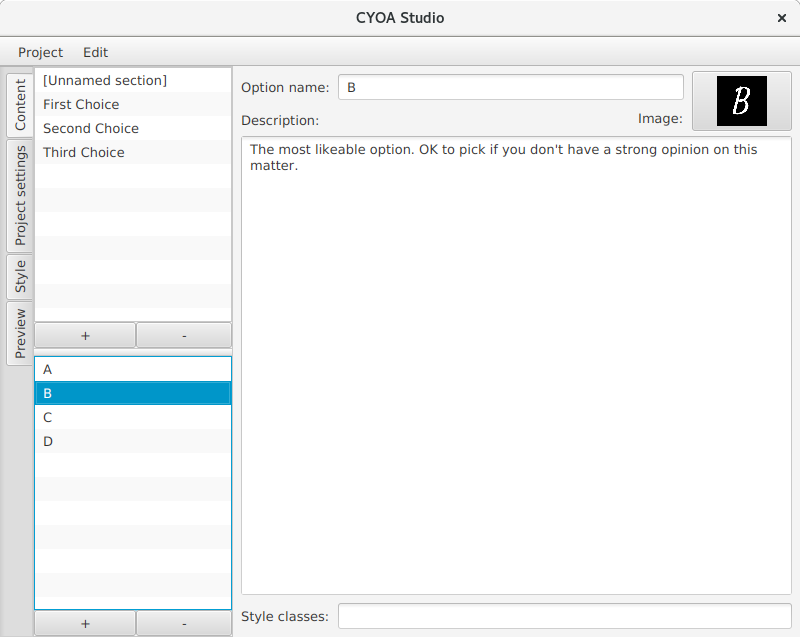
Content
On the left, there are two lists. The upper one contains the sections of your project, the lower one contains the options of the currently selected sections.
Upon selecting a section, the area to the right allows you to edit its values:
Section nameis the name of the section, as displayed in the editor and used as its title when exporting.Image positioningdetermines how the images of the options are laid out.Enable rollingsets whether or not the sections should display RYOA values.Options per rowdetermines how many options are put into a row.Image aspect ratioallows you to specify an aspect ratio that all the options in this section should use. This aspect ratio is enforced when trimming images.Descriptionis the description as displayed in the document.Style classesallows you to set custom CSS classes for custom styling (for advanced use cases).
Additionally, selecting a section displays its options in the lower list. Upon selecting an option, the area to the right allows you to edit its values:
Option nameis the name of the option, as displayed in the editor and used as its title when exporting.Costis the cost of the option.Roll rangedetermines, how many rolls should lead to this choice, if the section has rolling enabled. You only need to enter the number of options, the actual numbers that need to be rolled are calculated automatically. (E.g. entering “4” in this field means the actual rolls could be “8-11”, depending on the options before.)Imagedisplays a thumbnail of the image the option uses. Clicking the button allows you to edit the image.Descriptionis the description as displayed in the document.Style classesallows you to set custom CSS classes for custom styling (for advanced use cases).
You can create new sections and options using the corresponding + buttons. You can delete selected entries by using the - button.
Using the context menu, you can also duplicate entries. You can also access these actions using the Edit menu on top, which also allows you to sort entries alphabetically.
The descriptions as well as the names are parsed as common markdown. This means you can use *italic text*, **bold text**, lists and arbitrary HTML for formatting.
Image editor
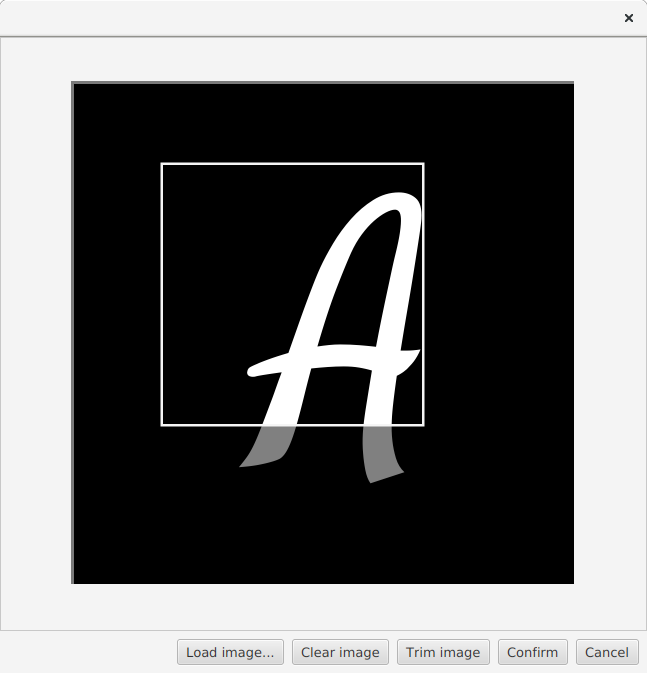
The image editor allows you to load and trim images. You can load images by using the Load image button, or by dropping images directly into the window. You can use drag and drop to quickly load images from your file system or even directly from your browser.
You can select an area of the image and cut it down using the Trim button. If the section has a fixed aspect ratio, it will automatically be enforced here.
Project settings
This tab allows you to edit basic options of the project.
Project titleis the title as displayed on top of the document.Maximum image heightdetermines how many pixels tall exported images may be at most. Large values may create very large image files. Very large values will result in errors on export.
Style
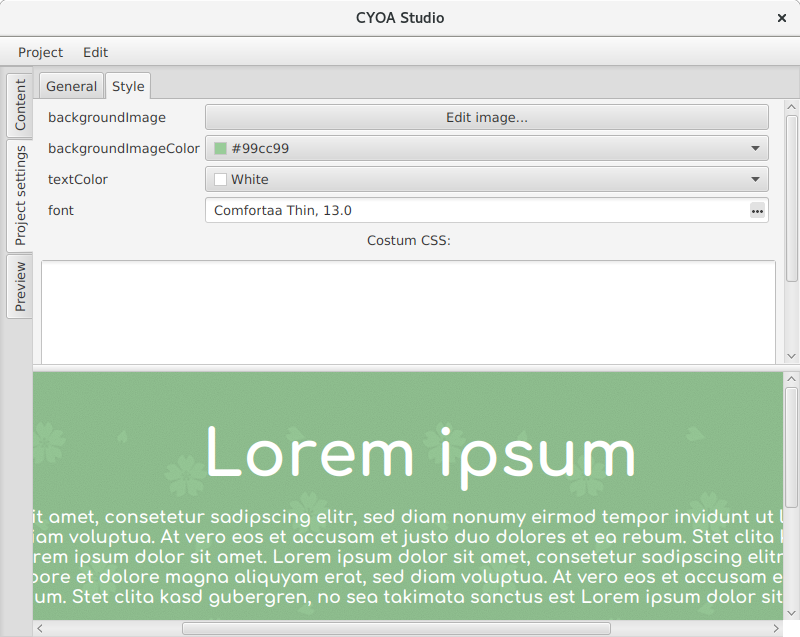
A template may give you several customization options, such as changing the background color or font. The exact options are dependent on the template used.
Notes:
- When clicking on
Custom colorin the color editor, the color selector may appear behind the main window. In that case, drag the main window around to find it. - For now, only the font family is used when selecting a font.
In the Custom CSS field you can enter additional CSS code to format the document. This might prove useful in combination with the custom classes on sections and options.
Preview
Displays a preview of your CYOA.
Export
Image
When you are content with your content, you can export your project to images using the Project->Export as->Image... option. You will be prompted for a folder. When you have selected a folder, the export process starts, creating images with your project name, a page number and the .png file ending in that folder. This process may take a while.
Templates
You can change the look of your document by importing a template using the Project->Import template options. You’ll most likely want to import a .cyoatemplate file using the From file... option. Importing a template will reset all your custom style options to the template’s default options. Custom classes and custom CSS will be kept however.
Troubleshooting
My exported images are completely or partially blank!
Try increasing the “Render delay” option in the setting window (found in the Edit menu). How high you need to go depends on your machine as well as the complexity of the projects you’re trying to export.
My options don’t completely fill up the rows!
Try updating Java.
Something else
If you have a problem not already listed here, or the solutions don’t work for you, contact me: